BEDKNOBS & BAUBLES

  • Interiors
    • My Home: Main Bathroom
    • My Home: Powder Room
    • My Home: Living Room
    • My Home: Dining Room
    • My Home: Main Bedroom
    • My Home: Front Porch
  • Lifestyle
  • Travel
    • Travel Posts
    • Travel Guides
  • Style
    • Style Posts
    • Outfits
    • The Coveted
  • Collaborate
  • About

Search Results for: behind the baubles

On the Right Foot: Peculiar European Traditions, Summer Camp Chic, the Best Flea Markets & More!

August 9, 2021 by jessica Leave a Comment

photo via Unsplash

You can thank the Victorians for picnic tables.

Target has some fun designer collabs coming this fall.

I’m tired of seeing all-white nurseries on Instagram, so this one made me smile.

12 of Europe’s most peculiar traditions.

A couple of home items that caught my eye recently: this plaid blanket and this accent table.

I’m late to the game with this one, but does anyone have Bala Bangles and what do you think of them? I’m considering a pair of the one-pound weights for my morning walks.

Is summer camp chic the latest jewelry trend?

A list of some of the best flea markets in the country.

Learn more about how pearls are made.

Redesigning cities for neurodiversity.

If you have an event on the horizon, check out this sweet dress!

Here’s what we did on our recent trip to Charleston.

–
Let’s keep in touch!
Instagram / Facebook / Pinterest / Bloglovin’

This post contains affiliate links.
Filed Under: Lifestyle Tagged With: On the Right Foot

6 Tips to Improve Your iPhone Travel Photography — And One Mistake to Avoid

May 6, 2021 by jessica Leave a Comment

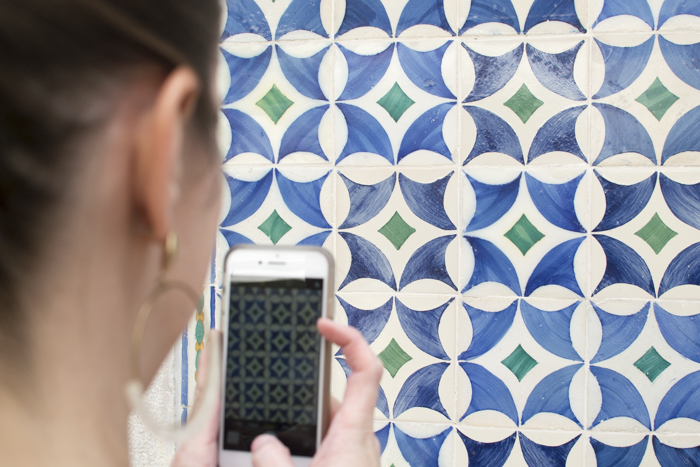
Taking photos of azulejos in Portugal.

There have been plenty of times on vacation that I’ve left my DSLR in the hotel room and have relied solely on my iPhone to snap photos — or, in the case of a quick weekend jaunt, left it at home entirely. I used to have pangs of regret, but now that iPhone camera technology has improved so dramatically in past years, it really can be a great substitute for the times that a traditional camera is too big and bulky to bring along.

I’m not the only one who sees the merit in using the iPhone in place of the “real” camera. I attended a virtual event recently with Pete Souza, former President Obama’s official White House photographer, who admitted to using his iPhone camera in place of the DSLR on occasion. If he can do it, I think that gives us all permission to opt for the camera that’s always in our pockets and purses!

It’s a big part of why I was intrigued to see a press release come across my email promoting photographer and author Scott Kelby’s new book, The iPhone Photography Book, a comprehensive guide to iPhone photography that goes through techniques to improve your snapshots with hints that include editing, composition, organization, and more. I had a chance to connect with Scott to share six tips for iPhone photography success with you, and the one mistake to avoid.

1. How to Stop “Missing the Shot!”

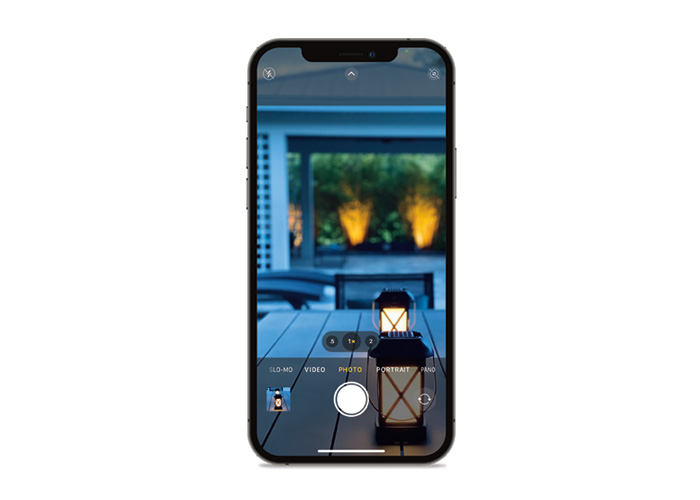
If you’ve ever missed a great moment because by the time you unlocked your iPhone, found the Camera app, and then launched it, it was too late, try this trick: When you pick up your iPhone to take a shot, don’t unlock it. Just pick it up, immediately swipe left, and your Camera app appears ready to go!

2. The Best Times to Shoot Travel

The best time to make beautiful travel photos is when the light outdoors is soft and beautiful, and that happens twice a day: about 30 minutes before sunrise, up until about 15 minutes after sunrise, and in the hour before and after sunset. A bonus for shooting around dawn: the tourists will not be awake yet, so you’ll get great shots with no crowds—just beautiful light and tourist-free monuments, streets, and scenes.

3. A Better Way to Take Photos without Tapping the Screen

On a traditional camera, you press a physical button to take a shot, which is one of the big advantages of a traditional camera. But, believe it or not, you can do the same thing with your iPhone: just press the volume up or volume down button to take a shot. Try it once and you’ll use this trick again and again. 

4. Capturing the Moment vs. Composition

When you see something charming, or fascinating, or wonderful happening, forget the composition and just capture the moment. We can always go back and crop the photo later in the Photos app to create the composition we were hoping for, but if you miss the “moment,” that moment is gone forever.

5. How to Stop from Having Photos That Are Too Dark or Too Bright

If you’re looking at a scene in front of you, and it seems too dark or too bright, or if your subject is backlit with the sun behind them, right after you tap on the screen to focus on your subject, tap-and-hold your finger on the screen and drag up to make the whole image brighter or down to make it darker.

6. The Secret to (and Two Methods for) Shooting Food

One big reason people love to travel is that they love trying the food, so you want to come back with shots of the amazing dishes you had on your trip. The secret to great food shots is simply great light, and you get that by shooting during the daytime and asking to be seated either outside (under an umbrella or roof of some sort) or right by a window. The two methods for getting great food shots: Turn on Portrait mode and zoom in tight (you don’t have to show the whole plate—just parts of it), and the classic “iPhone from overhead shot straight down on your food” shot.

One Mistake to Avoid: Showing Too Much of the Scene

When you try to capture an entire building (like a cathedral or an opera house or a classic, old building), you usually wind up with things that ruin the romance and timelessness of the shot because there are billboards, signs, power lines, etc. You don’t have to show the whole scene. Compose the shot to where you avoid all those distractions, just showing part of the building. Think of it as a “detail” shot. The viewer’s mind will fill in the rest of the image, but you’ll have an interesting and captivating image without all the distractions.

For more iPhone photography tips, you can pick up Scott’s book here!

–
Let’s keep in touch!
Instagram / Facebook / Pinterest / Bloglovin’

This post contains affiliate links. I received a review copy of Scott’s book, but was under no obligation to write about it.
Filed Under: Travel Tagged With: photography, travel

On the Right Foot: $20 Pajamas You’ll Love, Remembering Elsa Peretti, A One-Skillet Recipe to Try & More!

March 22, 2021 by jessica Leave a Comment

You guys! We got our COVID-19 vaccinations over the weekend! (It’s the only time I’ve been grateful for preexisting conditions.) It’s such a surreal feeling to have a great deal of the nervousness behind us in just a few short weeks!

I bought a set of these $20 pajamas recently and loved them so much that I already bought a second pair.

Remembering jewelry designer Elsa Peretti.

This one-skillet recipe for chicken and orzo sounds delicious, especially with the lemon juice and zest.

Immersive Van Gogh exhibits are headed to 13 U.S. cities this year. I bought mid-April tickets for the Chicago show last fall.

The cultural endurance of the Birkin bag.

It’s worth spending a night in your guest room to see what amenities might be missing.

Everything in the Lizzie Fortunato trunkshow is gorgeous! I’m considering pre-ordering this baroque pearl necklace with a tiny emerald.

Dropping extended sizing isn’t a great look for LOFT.

How the baseball hat became fashionable.

For an affordable spring update to your bedroom, try these watercolor floral sheets.

In case you missed it:

  • A must-have gadget for taper candle lovers.
  • Get a discount on Winc’s popular wine subscription box!
  • Give your home a spring refresh.

–
Let’s keep in touch!
Instagram / Facebook / Pinterest / Bloglovin’

This post contains affiliate links.

Filed Under: Lifestyle Tagged With: On the Right Foot

We did it! So long, 2020! + What’s in store for Q1

January 1, 2021 by jessica Leave a Comment

image credit: Betty Subrizi

2020. Was. A. Year.

I know we can’t let out a sigh of relief just yet, but turning the calendar to 2021 feels like we’ve hit a major milestone in leaving behind the worst of year of our generation. (Fingers crossed.) And, yet, there was some good that came out of our collective “gap year.” We learned to slow down. We grew green onions on our windowsills. We lovingly raised sourdough starters. We relished the simplicity of walks. We watched so much TV (and still raise an eyebrow when Carole Baskin comes up). We cherished family and friends, and cared for them by social distancing. We supported the restaurant industry by ordering contactless pickup and delivery. We stayed home to ease the burden on healthcare workers. We masked because we cared for more than just ourselves. We pushed the reset button on our lives and identified our priorities.

It was a tough year, but in some respects, a year we needed.

I was thinking back to a year ago when blogs and Instagram accounts were littered with ambitious to-do lists, grandiose travel plans, and annual one-word mantras. No one knew what 2020 had in store for us and how it would force us to adapt to change and live more intentionally. While I’m thrilled to finally have 2020 behind us, I hope to bring some of that flexibility and thoughtfulness to the new year. In 2021, I’m approaching annual planning a bit differently this time around and taking it one quarter at a time. (I was dangerously close to a Fast and the Furious reference there.)

Here are my goals for the first quarter of the new year:

  • Office makeover! Working from home isn’t my favorite and it doesn’t help that I have a terribly uninspired room that I’m working in — one that still has an unpacked box from when we moved in. That’ll be changing shortly and I’ll be sure to share some before photos (maybe after I move that box…) and the direction I’m going in soon!
  • Lose 5.5 pounds. I have a goal of losing 21 pounds in 2021. I might document this; I might not. I struggle with my weight and even just putting a number and time frame of my hopeful weight loss is a bit daunting. I’m excited, though!
  • Paint the bathroom ceiling. As you may recall, I gave the bathroom a mini refresh last fall. I swapped out the old florescent light fixture in favor of a smaller, schoolhouse-inspired one and I was left with a pockmarked ceiling that was only partially painted. I need to get around to finishing that.
  • Paint the guest room. I painted the guest room grey when we moved in without adequately testing paint swatches. It turns out, the grey I picked looks lilac most of the day. I hate it and I really need to do something about it.
  • Contractor quotes. I’d like to do some contractor research and narrow it down to three to give us quotes on a full bathroom remodel as well as quotes on redoing our original-porch-turned-sunroom. I have no idea what this will cost and I’d like to get a better idea of what we’re saving for.
  • Get in the habit of doing the dishes every night. I tend to let them sit for a day. I know.
  • Read three books. For those who are voracious readers, I realize reading three book isn’t an impressive goal for the first three months of the year. I used to read a lot (one of my majors is in English literature!), but haven’t prioritized it lately. I’d like to start reading a bit before bed each night and rediscover my love of the written word.

What’s on deck for you in 2021? Are you looking at the year as a whole or breaking it down into smaller chunks?

–
Let’s keep in touch!
Instagram / Facebook / Pinterest / Bloglovin’

Filed Under: Lifestyle Tagged With: new year's resolutions

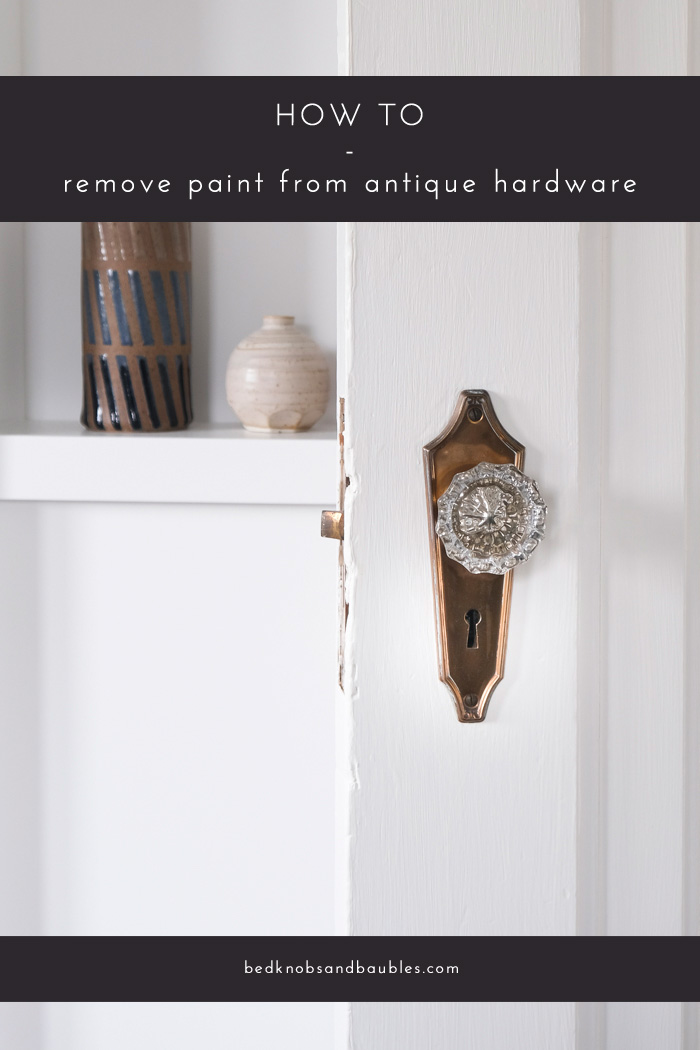
How to Remove Paint from Original Antique Hardware

October 20, 2020 by jessica Leave a Comment

How to Remove Paint from Brass Hardware

As far as I’m concerned, people who paint over hardware are the worst kind of people. (Well, no, but they’re up there.) I know that taking hardware off of the door and frame is a pain. It’s difficult to rehang a door. It’s annoying to take precious time away from painting in order to do the prep work. However, please, please, please just do it for people like me who have spent literal hours removing paint and polishing the original brass hardware in her 1920s home. That said, removing old paint (be it latex or lead-based) is an easy one, even if it can be time consuming.

How to Remove Paint from Brass Hardware

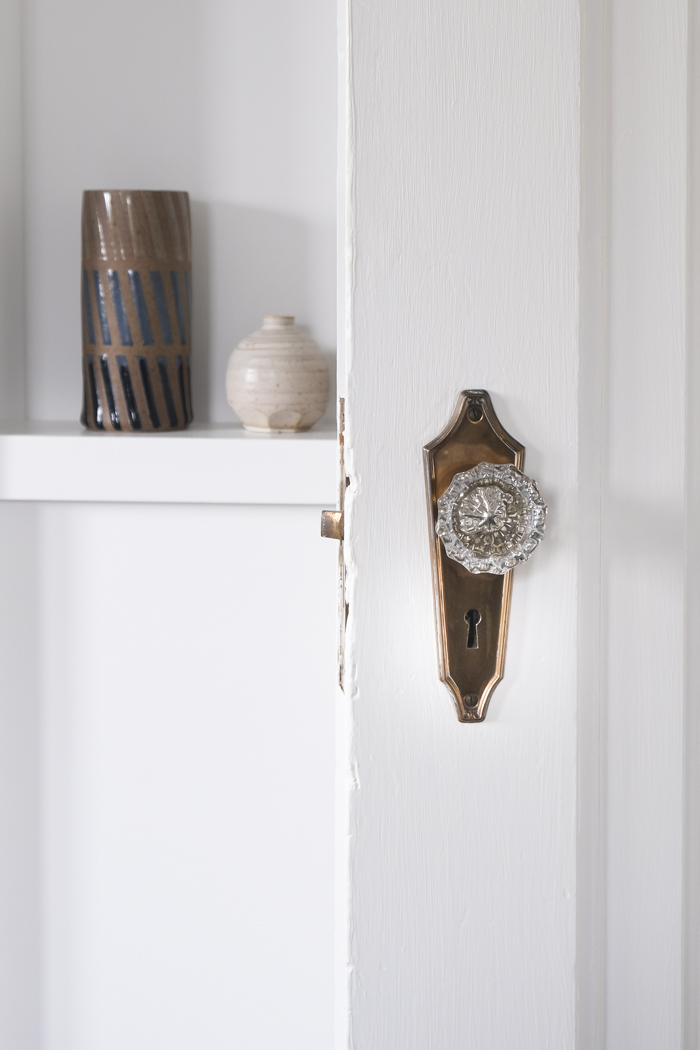
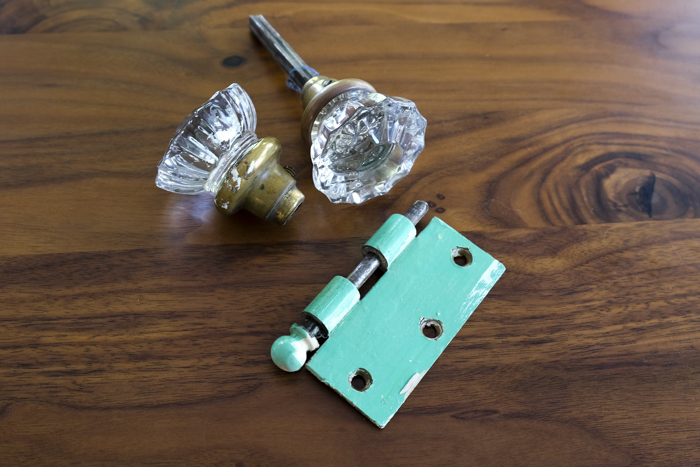
All of the hardware in our home was painted over to various degrees. (I mean, look at that green hinge from our guest room.) For the most part, the door hinges and mortise locksets were in the worst shape and only a few splatters were on the door knobs and rosettes. After doing some research, I found the following to being the most efficient process to removing the paint and bringing back luster to the brass.

Materials:

  • Old stock pot – You’re going to be boiling water and your hardware in this, so use an old one that you never plan to use for food again. If you don’t have one that you can dedicate to house projects, check Goodwill. Alternatively, here’s the cheapest one I found on Amazon with Prime shipping. You can also use an old Crock-Pot. This can be on the smaller side, but a lot of water will evaporate depending on how much hardware you’re cleaning at once.
  • Tongs – The cheaper the better for the same reasons as above.
  • Heat-resistant rubber gloves – For handling hot hardware when it’s done boiling.
  • Nylon bristle brush – You’ll need it to loosen some of the paint. If your hardware is already scratched and you don’t mind a few more scuffs, you can use a brass bristle brush. Keep in mind, though, it’s much more abrasive and you’ll be leaving scratches in its wake.
  • Utility knife – Useful for getting bits of paint out of small crevices.
  • Flitz polish – This metal polish has rave reviews on This Old House and it works really well. I used it for this project, but also on other vintage brass pieces.
  • Citristrip paint remover – You’re using boiling water for the majority of your paint removal, but as you’ll see below, there are a few times you’ll want to avoid dunking your piece in water: namely glass door knobs and mortise locksets. More info is in the “tips” section below.
  • Latex gloves – Between the metal polish, paint remover, and old flecks of paint, I promise you’ll want to keep your skin protected.
  • Old rags or paper towels – You’ll use these for polishing the hardware. I opted for paper towels to make cleanup easier, even if it’s not the most eco-friendly of choices.
How to Remove Paint from Antique Hardware

Steps:

  1. This step is crucial to making your life easier: Take each hinge off and slip them into plastic baggies labeled with the location of each component. I had labels such as “main bedroom door frame top” and “main bedroom door frame bottom” to keep everything as organized as possible. While the hinges all look the same, I didn’t want to risk swapping anything around if there had been imperceptible warping over the past 90 years. To that end, if there are shims behind your hinges, keep and label those, too. They’re there for a reason.
  2. Bring water to a boil in an old pot. You can also use an old Crock-Pot and let it simmer overnight. I prefer using a pot on the stovetop so I could move through the process in an afternoon for each set of hardware rather than waiting until the next day.
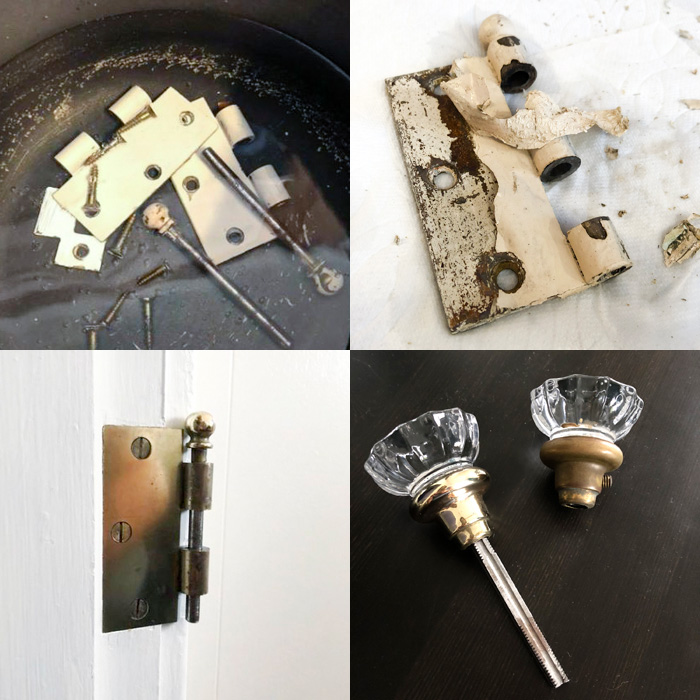
  3. Drop your hardware in and bring it to a boil. (Again, I did this section by section to avoid mixing up any hinges.) It takes about 20 to 30 minutes at a boil for the paint to loosen from the hardware, so be patient. And, please do this in a well-ventilated area. Theoretically, the latex paint will peel off in sheets and lead-based paint flakes off. Apparently in this situation, the lead isn’t as much of a concern compared to sanding it because the wetness is keeping it from being airborne. (Don’t hold me to this, though, it’s what I read on This Old House and I trust those folks. We’ll see how my lungs fare in a few decades.)
  4. Once the paint is starting to come off the hardware, remove it from the boiling water with a pair of tongs. This is where your heat-resistant rubber gloves come into play, too. You’ll need to hold the hardware and use your brush to scrub the remaining bits of paint off — and the hardware is extremely hot. Some of the paint might be stubborn. In those instances, I used a utility knife to gently scrape away the paint. This was also useful for getting into the crevice of screwheads. If that doesn’t work, put it back in the boiling water for a bit longer.
  5. At this point, you’ll need to let your hardware cool. It’ll look similar to the photo below. If you have bits of paint leftover after cleaning it, you can use the utility knife to get at the little bits before going to the next step: polishing.
  6. Polishing your hardware is incredibly satisfying. I prefer using Flitz polish. It’s non-toxic, but you might want to crack a window as it doesn’t smell the best. Donning a pair of latex gloves, smear polish on your hardware and give it a minute to start reacting. Then, using either a clean rag or paper towels, rub the polish over the hardware. You’ll need to keep finding a new area of your rag or paper towel as you remove more and more of the black tarnish from your hardware. A rag will be less abrasive, but I found that I preferred using paper towels as I went through quite a few of them.
  7. Rinse your hardware under running water, dry it, mount it!
How to Remove Paint from Brass Hardware

Tips:

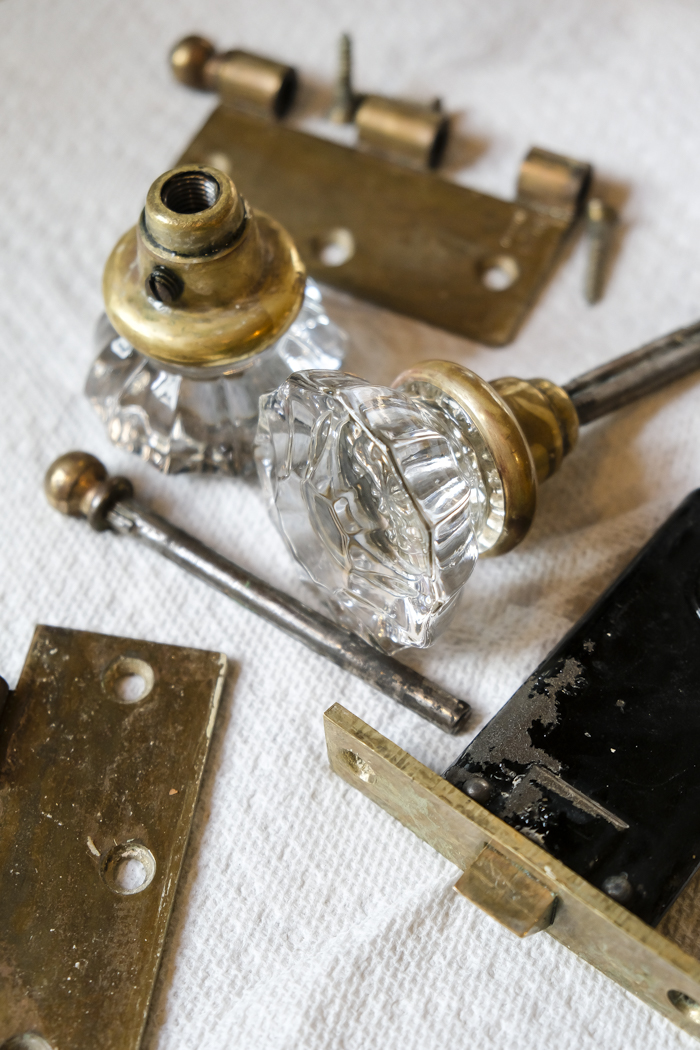
  • Do not boil glass doorknobs. Water can get stuck in the knob itself and take awhile to evaporate. In this instance, use Citristrip, a chemical-based paint remover that’s safe for indoor use, to remove the paint. You’ll need to protect your hands with a pair of gloves and smear on the chemical remover and wait a half hour or so. The paint will start to pull away from the hardware and you can wipe it off. I then rinsed it well under running water to remove the chemical and stop the reaction.
  • Paint on the glass portion of the doorknob can often be scraped off with a utility knife without scratching the glass.
  • I also did not boil the mortise lockset to avoid any accidental rust of the interior components.
  • When remounting the hardware, I put a fresh pair of latex gloves on. If you weren’t careful about removing every last bit of patina when polishing your hardware, it’s easy to transfer some of that black grime to your fingers and inadvertently get it on your door and frame. It didn’t clean off particularly well when the smudges happened to me, but a bit of touch-up paint did the trick.

Pin It for Later:

How to Remove Paint from Antique Hardware

–
Let’s keep in touch!
Instagram / Facebook / Pinterest / Bloglovin’

This post contains affiliate links.

Filed Under: DIY, Home, Interiors Tagged With: diy, Doors, Hardware, House Projects

  • « Previous Page
  • 1
  • …
  • 20
  • 21
  • 22
  • 23
  • 24
  • …
  • 36
  • Next Page »

Hello!


Jessica Hamm
Hello there! I'm a first-time homeowner updating a 1920s house in Madison, Wisconsin. I have a penchant for travel and a love of costume jewelry.

Keep In Touch

  • Bloglovin
  • Email
  • Facebook
  • Instagram
  • Pinterest
  • Twitter

Search

Latest Home Finds

Visit Me on Instagram!

Back in December, we booked @therobeychicago for a Back in December, we booked @therobeychicago for a couple nights in the summer and our long awaited anticipation of lounging by the rooftop pool was finally fulfilled last weekend. It also inadvertently became the weekend I made Dave eat a cheeseburger every day, between @redhotranchchicago, @eatmottst, and @smallcheval. There are worst ways to spend a weekend.

#chicago #visitchicago #therobey #therobeychicago #duckduckgoat #mottst #artinstituteofchicago #chicagoeats #auchevalchicago
Our guest room wasn’t a design priority until la Our guest room wasn’t a design priority until late last year when we finally bought a bed, mattress, and a set of sheets. We used some of our own extra bedding (tucking in the generous overhang of our king blankets under the queen-sized mattress) and old bedside lamps from our bedroom: functional, but not quite the charming space I’d envisioned.
 
That started to change when I purchased the Popcorn Grid Coverlet from Schoolhouse — an item I’d been eyeing for years — plus some graphic floral pillows. Then came a bright blue round cushion and the sweetest Teig lamp, both generously gifted by Schoolhouse, and the room finally started to come together. You can shop my picks here: https://liketk.it/5f322

#Ad #SchoolhousePartner #SchoolhouseSpringStyle #SchoolhouseLiving #InteriorInspo #SlowDecorating #GuestRoom
Growing up in northern Wisconsin, lilacs always hi Growing up in northern Wisconsin, lilacs always hit peak bloom right around my birthday on May 30. My mom would fill a large crystal vase with fresh-cut stems, and their scent would waft through the house. 

Now that I live a few hours south and lilac season wraps up earlier, the blooms actually mark the start of my birthday month.

#Lilacs #LilacSeason #SpringFlowers #InBloom #BirthdayMonth #MayBirthday
Snapshots from the past week: • Spent quality t Snapshots from the past week:

• Spent quality time with my favorite cat

• Biked for Pacificos, chips and quac, and tacos at @bandit.tacos 

• Loved how the rain collected on the Lady’s Mantle I planted last year

• Dipped my toes (quite literally) into this year’s mesh shoe trend

• Snapped a lot of Lily content

• Drove home with a new lilac in the passenger seat
Finishing our guest room has been a focus of ours Finishing our guest room has been a focus of ours this year, and the cute Teig Lamp from Schoolhouse is such a charming addition to the space. It’s named for the German word for “dough,” which is perfect for its soft, petite shape.

Find this and the other Schoolhouse items we’re using in the space here: https://www.shopltk.com/explore/bedknobsandbaubles/posts/e01ae8c9-38af-11f0-b5c2-0242ac11000b

(The lamp and circle pillow were gifted. I purchased the other items.)

 #schoolhousespringstyle #schoolhousepartner #ad
Stripes, windowpane, floral, and a single polka do Stripes, windowpane, floral, and a single polka dot of bright blue to punctuate our guest room bedding. 

#guestroom #bedding #schoolhouseliving #schoolhouse #landsend #homedesign
Load More... Follow on Instagram

Copyright © 2025 · Jennifer on Genesis Framework · WordPress · Log in