BEDKNOBS & BAUBLES

  • Interiors
    • My Home: Main Bathroom
    • My Home: Powder Room
    • My Home: Living Room
    • My Home: Dining Room
    • My Home: Main Bedroom
    • My Home: Front Porch
  • Lifestyle
  • Travel
    • Travel Posts
    • Travel Guides
  • Style
    • Style Posts
    • Outfits
    • The Coveted
  • Collaborate
  • About

How to Remove Paint from Original Antique Hardware

October 20, 2020 by jessica Leave a Comment

How to Remove Paint from Brass Hardware

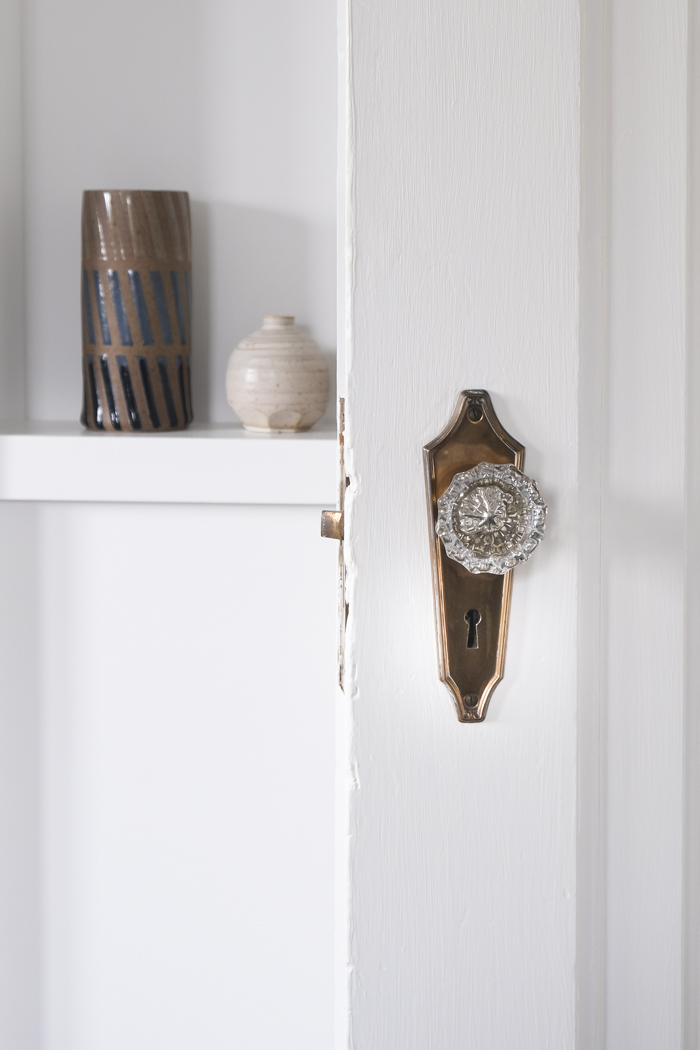
As far as I’m concerned, people who paint over hardware are the worst kind of people. (Well, no, but they’re up there.) I know that taking hardware off of the door and frame is a pain. It’s difficult to rehang a door. It’s annoying to take precious time away from painting in order to do the prep work. However, please, please, please just do it for people like me who have spent literal hours removing paint and polishing the original brass hardware in her 1920s home. That said, removing old paint (be it latex or lead-based) is an easy one, even if it can be time consuming.

How to Remove Paint from Brass Hardware

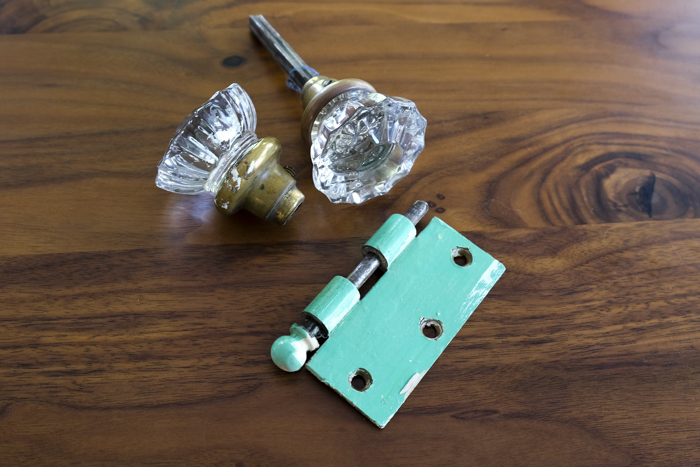
All of the hardware in our home was painted over to various degrees. (I mean, look at that green hinge from our guest room.) For the most part, the door hinges and mortise locksets were in the worst shape and only a few splatters were on the door knobs and rosettes. After doing some research, I found the following to being the most efficient process to removing the paint and bringing back luster to the brass.

Materials:

  • Old stock pot – You’re going to be boiling water and your hardware in this, so use an old one that you never plan to use for food again. If you don’t have one that you can dedicate to house projects, check Goodwill. Alternatively, here’s the cheapest one I found on Amazon with Prime shipping. You can also use an old Crock-Pot. This can be on the smaller side, but a lot of water will evaporate depending on how much hardware you’re cleaning at once.
  • Tongs – The cheaper the better for the same reasons as above.
  • Heat-resistant rubber gloves – For handling hot hardware when it’s done boiling.
  • Nylon bristle brush – You’ll need it to loosen some of the paint. If your hardware is already scratched and you don’t mind a few more scuffs, you can use a brass bristle brush. Keep in mind, though, it’s much more abrasive and you’ll be leaving scratches in its wake.
  • Utility knife – Useful for getting bits of paint out of small crevices.
  • Flitz polish – This metal polish has rave reviews on This Old House and it works really well. I used it for this project, but also on other vintage brass pieces.
  • Citristrip paint remover – You’re using boiling water for the majority of your paint removal, but as you’ll see below, there are a few times you’ll want to avoid dunking your piece in water: namely glass door knobs and mortise locksets. More info is in the “tips” section below.
  • Latex gloves – Between the metal polish, paint remover, and old flecks of paint, I promise you’ll want to keep your skin protected.
  • Old rags or paper towels – You’ll use these for polishing the hardware. I opted for paper towels to make cleanup easier, even if it’s not the most eco-friendly of choices.
How to Remove Paint from Antique Hardware

Steps:

  1. This step is crucial to making your life easier: Take each hinge off and slip them into plastic baggies labeled with the location of each component. I had labels such as “main bedroom door frame top” and “main bedroom door frame bottom” to keep everything as organized as possible. While the hinges all look the same, I didn’t want to risk swapping anything around if there had been imperceptible warping over the past 90 years. To that end, if there are shims behind your hinges, keep and label those, too. They’re there for a reason.
  2. Bring water to a boil in an old pot. You can also use an old Crock-Pot and let it simmer overnight. I prefer using a pot on the stovetop so I could move through the process in an afternoon for each set of hardware rather than waiting until the next day.
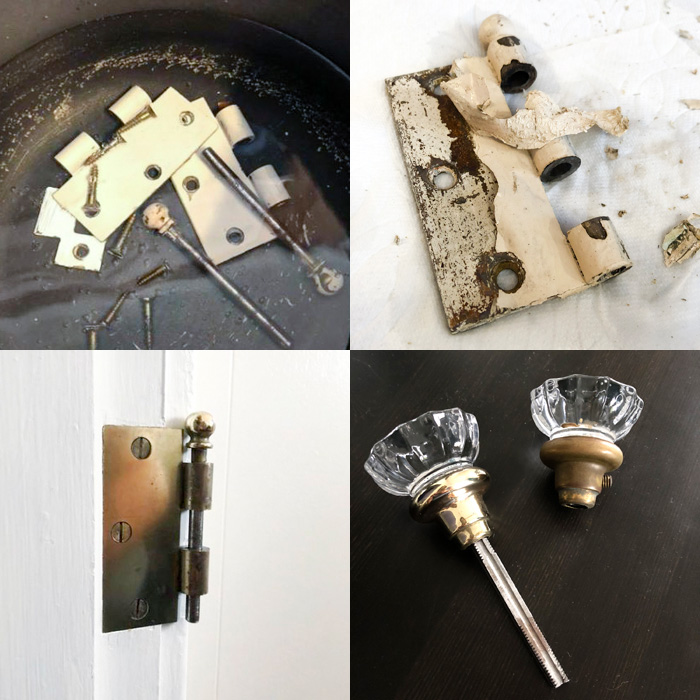
  3. Drop your hardware in and bring it to a boil. (Again, I did this section by section to avoid mixing up any hinges.) It takes about 20 to 30 minutes at a boil for the paint to loosen from the hardware, so be patient. And, please do this in a well-ventilated area. Theoretically, the latex paint will peel off in sheets and lead-based paint flakes off. Apparently in this situation, the lead isn’t as much of a concern compared to sanding it because the wetness is keeping it from being airborne. (Don’t hold me to this, though, it’s what I read on This Old House and I trust those folks. We’ll see how my lungs fare in a few decades.)
  4. Once the paint is starting to come off the hardware, remove it from the boiling water with a pair of tongs. This is where your heat-resistant rubber gloves come into play, too. You’ll need to hold the hardware and use your brush to scrub the remaining bits of paint off — and the hardware is extremely hot. Some of the paint might be stubborn. In those instances, I used a utility knife to gently scrape away the paint. This was also useful for getting into the crevice of screwheads. If that doesn’t work, put it back in the boiling water for a bit longer.
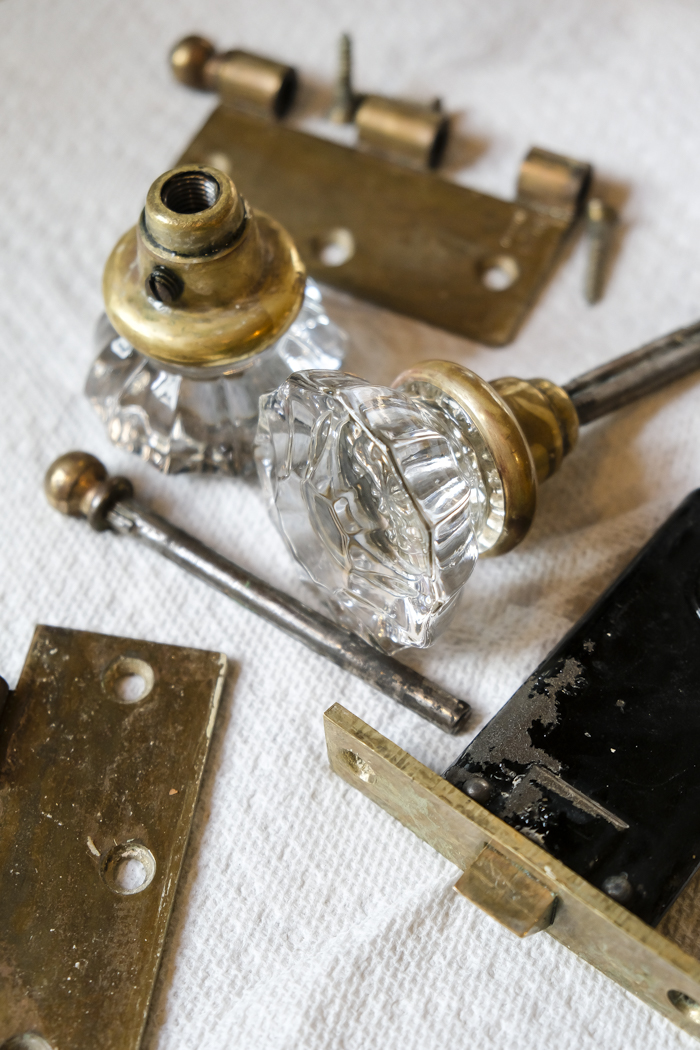
  5. At this point, you’ll need to let your hardware cool. It’ll look similar to the photo below. If you have bits of paint leftover after cleaning it, you can use the utility knife to get at the little bits before going to the next step: polishing.
  6. Polishing your hardware is incredibly satisfying. I prefer using Flitz polish. It’s non-toxic, but you might want to crack a window as it doesn’t smell the best. Donning a pair of latex gloves, smear polish on your hardware and give it a minute to start reacting. Then, using either a clean rag or paper towels, rub the polish over the hardware. You’ll need to keep finding a new area of your rag or paper towel as you remove more and more of the black tarnish from your hardware. A rag will be less abrasive, but I found that I preferred using paper towels as I went through quite a few of them.
  7. Rinse your hardware under running water, dry it, mount it!
How to Remove Paint from Brass Hardware

Tips:

  • Do not boil glass doorknobs. Water can get stuck in the knob itself and take awhile to evaporate. In this instance, use Citristrip, a chemical-based paint remover that’s safe for indoor use, to remove the paint. You’ll need to protect your hands with a pair of gloves and smear on the chemical remover and wait a half hour or so. The paint will start to pull away from the hardware and you can wipe it off. I then rinsed it well under running water to remove the chemical and stop the reaction.
  • Paint on the glass portion of the doorknob can often be scraped off with a utility knife without scratching the glass.
  • I also did not boil the mortise lockset to avoid any accidental rust of the interior components.
  • When remounting the hardware, I put a fresh pair of latex gloves on. If you weren’t careful about removing every last bit of patina when polishing your hardware, it’s easy to transfer some of that black grime to your fingers and inadvertently get it on your door and frame. It didn’t clean off particularly well when the smudges happened to me, but a bit of touch-up paint did the trick.

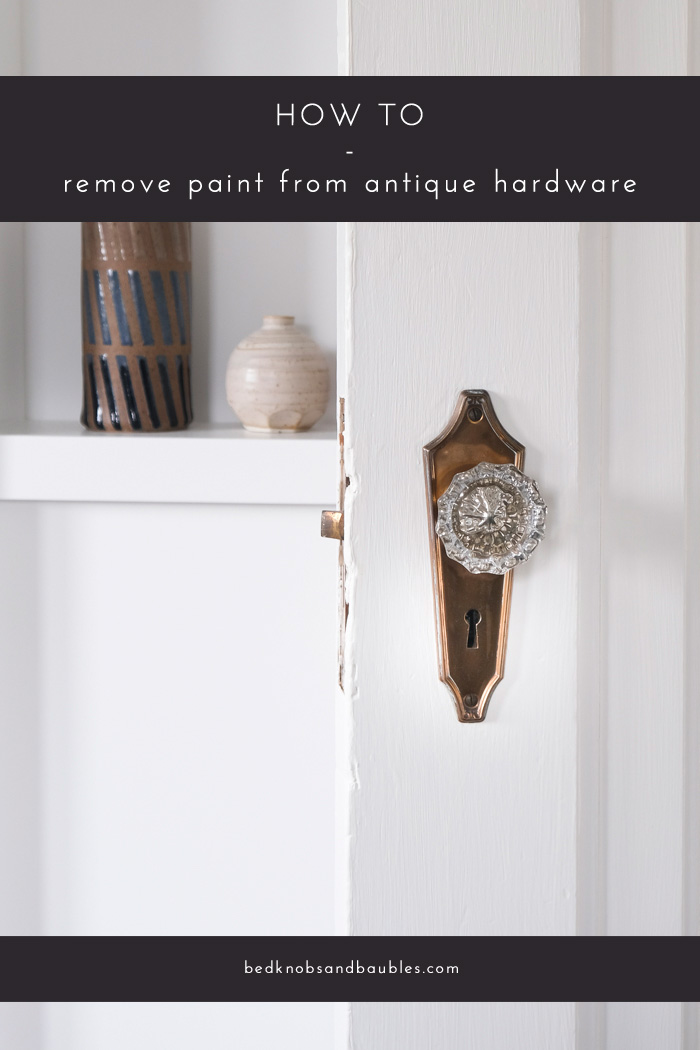
Pin It for Later:

How to Remove Paint from Antique Hardware

–
Let’s keep in touch!
Instagram / Facebook / Pinterest / Bloglovin’

This post contains affiliate links.
Filed Under: DIY, Home, Interiors Tagged With: diy, Doors, Hardware, House Projects

The Best $0.79 to Spend on Your Home

September 23, 2020 by jessica Leave a Comment

Ikea Tekla Dish Towel

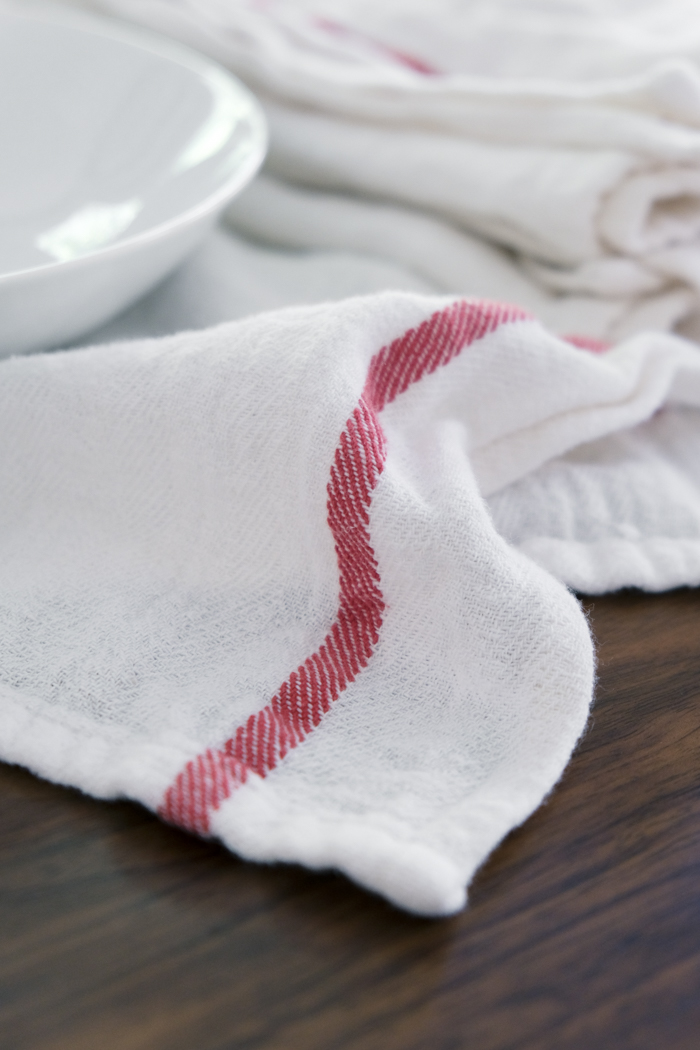
IKEA’s Tekla dish towels are a cult favorite for their low price and durability, but what makes them even better is that they can double as cloth napkins. I don’t know if you’ve looked at the price of cloth napkins lately, but they’re surprisingly expensive for a swath of fabric that’s inevitably going to be stained with red wine. With these, however, you can afford to stock up. They’re generously sized with a charming red border that reminds me of a French bistro, and I love the idea of pairing them with a linen tablecloth for casual dinners this fall. Plus, let’s face it, Thanksgiving is likely going to be a low key affair this year, so you may as well take it a step further with a selection of brass candlesticks (preferably vintage and cleaned up with Flitz polish) for a farm-to-table-inspired look.

–
Let’s keep in touch!
Instagram / Facebook / Pinterest / Bloglovin’

Filed Under: Home Tagged With: dining room, Ikea, Kitchen, Table Settings

Help me choose a rug

September 9, 2020 by jessica Leave a Comment

Living Room Rug Options
rugs one, two, and three

Hey, I hope you had a great Labor Day weekend! We spent Saturday in the Milwaukee area going to a county park, having an outdoor lunch at a brewery, and swinging by IKEA. The latter of which didn’t feel nearly as safe as the other activities of the day. While IKEA is usually a madhouse, it felt more claustrophobic in the midst of a pandemic — not exactly what I was hoping for during my first retail outing since March, aside from Target and the grocery store. I definitely scratched that in-store itch that day, but a couple of hours of looking at home decor inspired me to continue making upgrades around the house before winter sets in.

As far as exterior projects are concerned, I finally painted our front porch railings matte black (see the before; progress photos to come). Inside, I started looking for a new living room rug. We’ve been using this wool rug that we purchased when we lived in the apartment. It’s nice and all, but it’s too small for the space and doesn’t really work with the direction our living room is moving in. We really want a vintage rug, but affordable ones are hard to come by and we’re not exactly frequenting antique stores to find one. So, we’re going the cheap route for the time being. I’ve read good things about the Loloi II line (they’re often cheaper here with the option for in-person returns) and narrowed it down to my three favorites above and put them into a collage with some of our other living room pieces. (The coffee table is also from the apartment and I’d like to replace it with something that better fits our mid-century-meets-traditional aesthetic. Possibly this one.)

Of the three we narrowed it down to, I really love the second one. However, in the up-close view, I don’t like the tufted look for a vintage-inspired rug as much as I like the thinner woven look of the other two. So, here’s what we’re looking at:

Living Room Rug Options

Dave is leaning more toward this one and I think I’m in agreement. I prefer blues and greens over warm hues and the background of this one has more of those cooler tones. That said, I don’t love the center medallion, but the coffee table will be over that. My biggest hesitation here is if the geometric patterns of our throw blankets and pillows will look out of place with the rug. Clearly I’m no stranger to pattern mixing, but those just seem so dissimilar that I’m pumping the brakes a bit.

Living Room Rug Options

Then there’s this rug that has a lot more red than I’m necessarily on board with. However, the pattern of this one doesn’t compete with the plaids and stripes as much as the other one does. Plus, I like that the border has a lot blues in the design.

Which one do you like? We’d be opting for the 7.5′ x 9.5′ size, so it’s only around the $160-170 mark and returnable at Walmart. I could always order one and see how it looks, but I’d really rather avoid the hassle and nail it on the first try!

Sources
Credenza (by Ekais; I don’t think they’re in business anymore.)
Artwork (c/o Minted)
Striped Pillow
Plaid Pillow (similar)
Leather Chair (ours has wood legs)
Couch (amazing quality; looks new after three years)
Coffee Table
Side Table
Throw Blanket

–
Let’s keep in touch!
Instagram / Facebook / Pinterest / Bloglovin’

Filed Under: Home, Living Room Tagged With: living room, Rugs

We stained the front porch!

August 28, 2020 by jessica Leave a Comment

Sherwin Williams SuperDeck Wet Clay

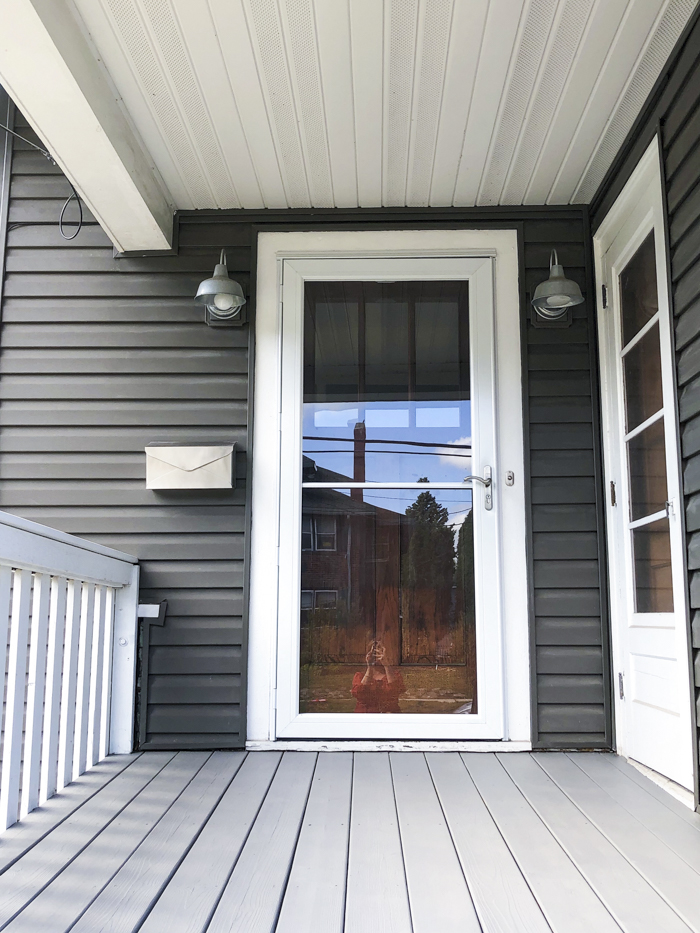
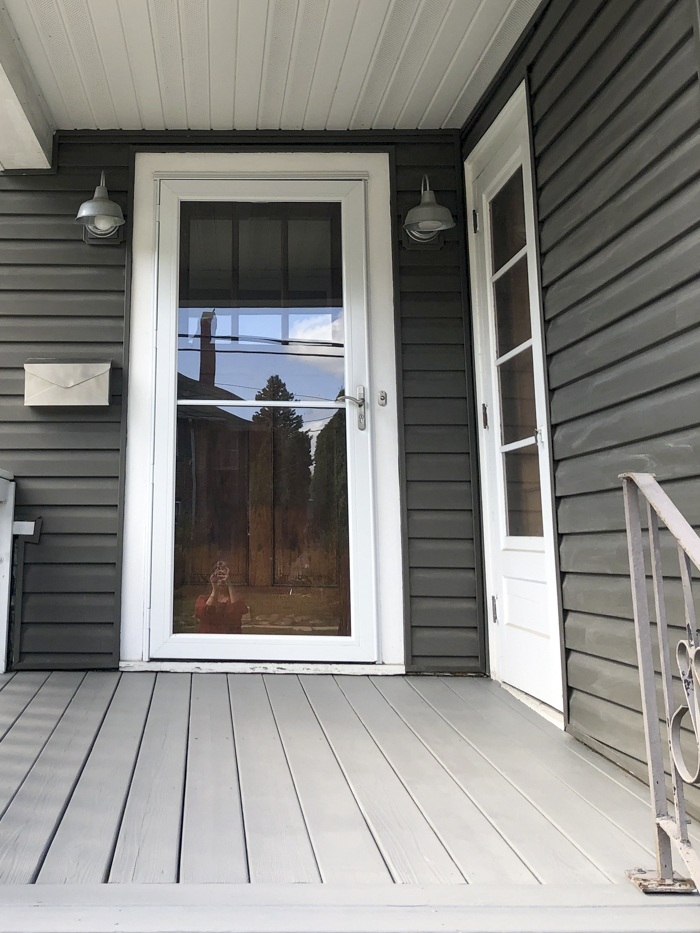
You may remember last year’s front porch project when we replaced our screen door. And, now, we’re another step closer to completing the front porch now that we’ve stained the floor!

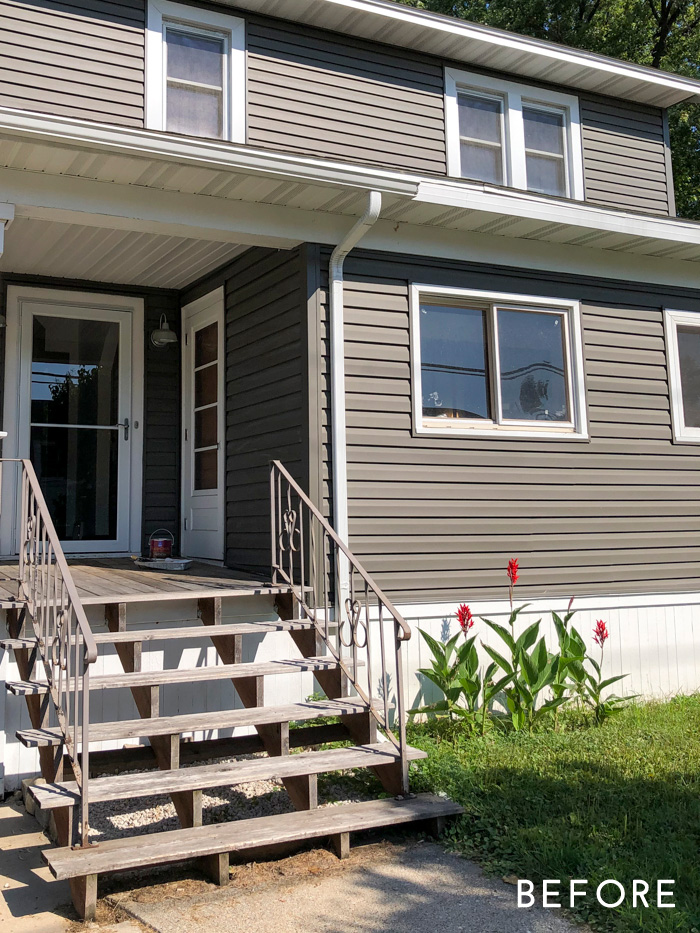
The process wasn’t without its frustrations, though, as you’ll see below. But first, let’s start with a before photo of the front of our house. (Side note: you’ll notice that the siding looks different in just about every photo depending on the light. The most true color is what you see above. It’s also in desperate need of a powerwash.)

Two year update: See how the stain held up here!

Progress Report: Front Porch

Okay, so this isn’t a real before image when the entire bottom portion of the house was unpainted wood and we still had the old storm door, but this gives you an idea of what we’re working with. Ultimately, we’d like to give our house a full face lift. The original front porch that went along the front of the house had been closed off years ago. We’d like to add more windows (vertical, double-hung) to give the home more appropriate historic curb appeal. Plus, that door to the right is permanently sealed. It would have led to the porch at some point. We need to have that removed and scrounge up enough siding remnants to close it in from the outside. Whenever we’re able to do this, we’ll redo the front stairs entirely. They’re someone’s DIY project and they’re not even deep enough for kickboards. But, as with everything, these lofty plans cost a lot of money and we needed to do something to make it cuter in the meantime.

We had left the wood raw for the last three years as we hemmed and hawed over the the pros and cons of paint versus stain. I preferred the opacity of paint, but everyone seemed to be pushing us toward stain because of its durability. It wasn’t until earlier this summer that I discovered that Sherwin-Williams carries an opaque stain, which is the best of both worlds!

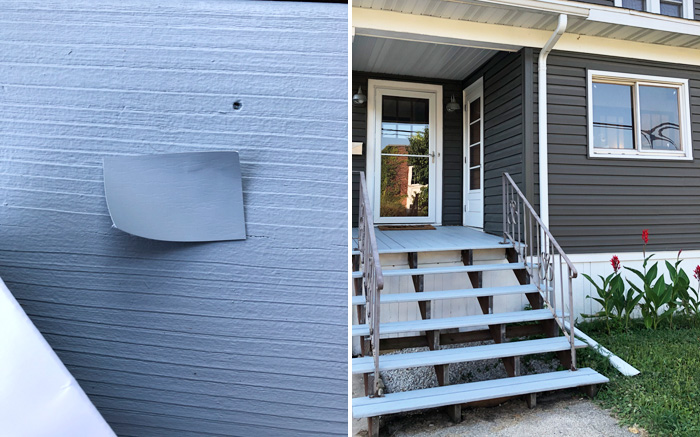
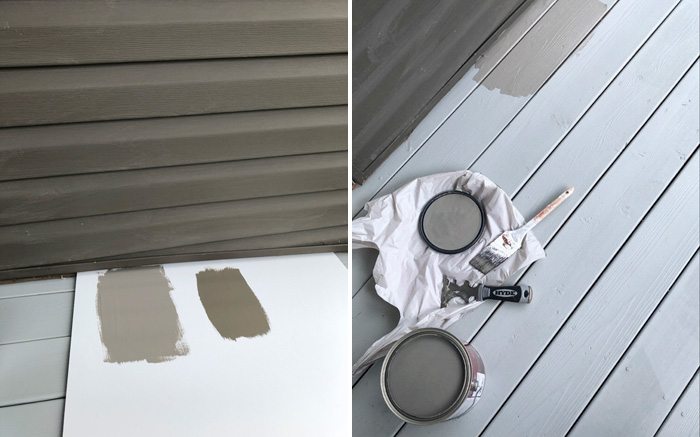
I was a bit cavalier about my selection of colors, holding up the color chips to the siding and went with my first impulse: Gray Birch. From the sample, it seemed to be a warm, light gray. Clearly, I wrong:

There were so many blue undertones to this stain that it appeared baby blue next to the color of our siding. I probably should have stopped earlier, but I kept wondering if it would dry differently or that I’d like it if I really gave it a fair shot. Instead, I hated it more and more. At one point, I thought I ordered the wrong color and peeled the chip off the card to hold against the applied stain. A perfect match. It’s just that blue.

(P.S. We’d eventually stain those stair risers when we figured out the right color.)

Sherwin-Williams SuperDeck Wet Clay vs. Flagstone

After that fiasco, I had about a half-gallon left and talked to Sherwin-Williams to see how I should proceed. They told me that the wood could really only hold one more coat of stain before it would just chip off and ruin the integrity of the product. They stained it deeper, getting closer to the King’s Canyon color and gave me a paint stick dipped in the hue to hold up against the house. That ended up having purple undertones, so I switched gears entirely and picked a new area of the color chart to try, opting for Wet Clay (above, left) and Flagstone. (They weren’t able to do samples of these in stain, but were able to give me paint to use on a piece of poster board to check against the house.) These colors had more yellow to the base and ended up being really great options. (Let that be a lesson to you to always get samples first!) I went with Wet Clay and the second coat of applied stain completely covered the first without any hints of color coming through.

Note: I’m unable to find the Wet Clay stain color on the Sherwin-Williams website. The color code is SW 3083.

Sherwin Williams SuperDeck Wet Clay

I am so happy with how it turned out! I can’t speak to the durability of the color until we get through a Wisconsin winter, but I did try to chip at it with my fingernail and it held tight.

Two year update: See how the stain held up here!

So, next on the list is doing something about those iron railings (might replace, might just spray paint them matte black with Rust-Oleum), touching up the white paint, and replacing the sconces. In full disclosure, I don’t mind the shape of the sconces, but they are so incredibly flimsy and cheap — and they’re starting to rust.

Sources: Andersen storm door | CB2 mailbox (also love this one) | House of Antique Hardware doorbell | Sherwin-Williams SuperDeck opaque stain in Wet Clay

–
Let’s keep in touch!
Instagram / Facebook / Pinterest / Bloglovin’

Filed Under: Front Porch, Home Tagged With: Front Porch, home renovation

Roundup: 10 Accent Mirrors

August 19, 2020 by jessica Leave a Comment

Target Brass Circle Mirror

If you were stopping by today for my picks from the Nordstrom Anniversary Sale, I’m sorry to disappoint. I haven’t had much interest in shopping the sale this year (even if I’m intrigued by this coat), so instead you’re getting a roundup of 10 accent mirrors! This was inspired by a conversation I had with a friend last week when she reached out for my opinion on two mirrors she had purchased for her home. After a few texts back and forth, we decided that neither mirror was quite right and set to the internet to find alternatives. It seemed silly to have all of that research relinquished to a string of iMessages, so I thought I’d share them with you along with a few others that caught my eye. After all, sprucing up your place is one of the best pandemic distractions to have on the heels of autumn when we’ll all be spending a lot more time indoors.

To browse the selection, click through the slideshow below.
Each picture is linked to the retailer’s site.

Sources above: Target mirror | Minted print (c/o) | West Elm bar cabinet | West Elm tray | CB2 decanter | West Elm lamp | West Elm planters | cocktail picks | various vintage knickknacks

–
Let’s keep in touch!
Instagram / Facebook / Pinterest / Bloglovin’

Filed Under: Home Tagged With: home decor, Mirrors

  • « Previous Page
  • 1
  • …
  • 8
  • 9
  • 10
  • 11
  • 12
  • …
  • 24
  • Next Page »

Hello!


Jessica Hamm
Hello there! I'm a first-time homeowner updating a 1920s house in Madison, Wisconsin. I have a penchant for travel and a love of costume jewelry.

Keep In Touch

  • Bloglovin
  • Email
  • Facebook
  • Instagram
  • Pinterest
  • Twitter

Search

Instagram

It’s so nice to be home after a whirlwind week. It’s so nice to be home after a whirlwind week. We flew out to Philadelphia last Friday for a few days of exploring. It was our first time in the City of Brotherly Love and we loved every minute of it from the architecture to the restaurants, and most of all: the welcoming and friendly people. After that, we had one night at home before a flight to Denver to celebrate my cousin’s wedding. We got back to Madison late last night and have spent the day puttering around the house, getting caught up on laundry, grocery shopping, harvesting the season’s first tomatoes from the garden, and admiring just how much the hydrangeas have grown in the course of a week.
I always get a kick out of comparing views of our I always get a kick out of comparing views of our home today to the photos I took during our home inspection. (Swipe to see our main bedroom then!) While I knew the house had potential, it was hard to look past some of the owner’s “design” choices. Though, it looks like the room was destined to have a warm-toned quilt. 😂

P.S. @schoolhouse just released new colors of their popular Stillwater Floral Quilt!

And, for those interested, I’ve linked my bedroom items here: https://liketk.it/5iC8R

#SchoolhouseLiving #InteriorInspo #SlowDecorating #BedroomDecor #MainBedroom #CenturyHome #StillwaterFloral #HomeReno #HomeRenovation
Back in December, we booked @therobeychicago for a Back in December, we booked @therobeychicago for a couple nights in the summer and our long awaited anticipation of lounging by the rooftop pool was finally fulfilled last weekend. It also inadvertently became the weekend I made Dave eat a cheeseburger every day, between @redhotranchchicago, @eatmottst, and @smallcheval. There are worst ways to spend a weekend.

#chicago #visitchicago #therobey #therobeychicago #duckduckgoat #mottst #artinstituteofchicago #chicagoeats #auchevalchicago
Our guest room wasn’t a design priority until la Our guest room wasn’t a design priority until late last year when we finally bought a bed, mattress, and a set of sheets. We used some of our own extra bedding (tucking in the generous overhang of our king blankets under the queen-sized mattress) and old bedside lamps from our bedroom: functional, but not quite the charming space I’d envisioned.
 
That started to change when I purchased the Popcorn Grid Coverlet from Schoolhouse — an item I’d been eyeing for years — plus some graphic floral pillows. Then came a bright blue round cushion and the sweetest Teig lamp, both generously gifted by Schoolhouse, and the room finally started to come together. You can shop my picks here: https://liketk.it/5f322

#Ad #SchoolhousePartner #SchoolhouseSpringStyle #SchoolhouseLiving #InteriorInspo #SlowDecorating #GuestRoom
Growing up in northern Wisconsin, lilacs always hi Growing up in northern Wisconsin, lilacs always hit peak bloom right around my birthday on May 30. My mom would fill a large crystal vase with fresh-cut stems, and their scent would waft through the house. 

Now that I live a few hours south and lilac season wraps up earlier, the blooms actually mark the start of my birthday month.

#Lilacs #LilacSeason #SpringFlowers #InBloom #BirthdayMonth #MayBirthday
Snapshots from the past week: • Spent quality t Snapshots from the past week:

• Spent quality time with my favorite cat

• Biked for Pacificos, chips and quac, and tacos at @bandit.tacos 

• Loved how the rain collected on the Lady’s Mantle I planted last year

• Dipped my toes (quite literally) into this year’s mesh shoe trend

• Snapped a lot of Lily content

• Drove home with a new lilac in the passenger seat
Load More... Follow on Instagram

Copyright © 2025 · Jennifer on Genesis Framework · WordPress · Log in